Travis + PyInstaller + GitHub Releases
Part of one of the projects I’ve been working on in my day job recently has involved taking over the development of a tool that implements some simple data anonymisation. This includes the deployment of an executable that can be used by non-technical staff, who will likely be the main users of the tool. It’s also highly likely that all of those staff will be working on Windows PCs. As the executable is created through PyInstaller, this means the executable needs to be built in a Windows environment. Initially, I’d just been doing this locally on my PC to create the executable for distribution.
As the client has a remit to encourage the development of open-source tools,
the whole project is hosted on GitHub. I figured this was a good excuse to set
up some continuous integration via Travis,
alongside a few other tools that should aid with any future development of the
project (which I might cover at a later date). When I subsequently learned that
Travis can push to GitHub Releases as part of its deploy phase I realised
this could be a way to simplify the deployment part of the project, particularly
if it is taken over by someone unfamiliar with PyInstaller.
This… turned out to be quite a bit fiddlier than expected, so I’ve created a very basic repo providing a minimal working set-up. In this post I’m going to run through the various parts of getting this repo working with Travis, and perhaps some of the less clear elements.
Setting up the repo on Travis
On the Travis itself, the repo is fairly straightforward to set up. Once the repository is activated, we need to add an environmental variable to store a private key to allow Travis to push to GitHub releases. The Environment Variables can either be accessed through “More Options” and then “Settings” from the repo dashboard, or more generally through
https://travis-ci.org/user_name/repo_name/settings
For this example, we’ll use the variable name RELEASE_TOKEN. To get our value,
we need to go to GitHub and
add a new token. This will need to have
Repo scope, but doesn’t require anything further. Copy the key provided into the
“VALUE” field in Travis. Make sure you keep “DISPLAY VALUE IN BUILD LOG”
unticked to keep the value out of your logs, and thus not visible to anyone
else.
Preparing the GitHub repository
For this setup, we’ll assume there’s a requirements.txt file in the GitHub
repository to detail the required modules. We also have a PyInstaller spec file,
in this example called hello.spec, generated the first time PyInstaller is
run (and modified if needs be). Assuming we want to build our executable with
Python 3.7, our .travis.yml file looks as follows:
os: windows
language: shell
before_install:
  - choco install python --version=3.7
  - python -m pip install --upgrade pip
env: PATH=/c/Python37:/c/Python37/Scripts:$PATH
install:
  - pip install -r requirements.txt
script:
  - bash -c echo "Tests would go here"
before_deploy:
  - pyinstaller "hello.spec"
deploy:
  provider: releases
  api_key: $RELEASE_TOKEN
  file_glob: true
  file: dist/*.exe
  skip_cleanup: true
  draft: true
  on:
    tags: true
This is a fairly typical Travis file, but with a couple of unusual parts to
it. First, you’ll notice our language is listed as shell rather than python.
This is because, unlike the OSX and Linx builds, Travis’ Windows build doesn’t
include a version of Python by default. However, it does include
chocolatey which allows us to install Python fairly
easily. If you have a more complicated Python set-up, chocolatey also has
support for Anaconda, through
choco install anaconda3
We then also need to add the Python install location to our PATH environment
variable. As we’re using Python 3.7, this is at C:\Python37 but it should
be easy to see how this could be modified for other Python versions. Our
install phase uses requirements.txt as mentioned earlier. We have no
tests to run but these would fit into the script phase.
Our before_deploy phase is where we build our executable - PyInstaller puts
this into a dist folder, hence our deploy phase uses a wildcard to select
any .exe files in here, by setting file_glob: true. In terms of our other
settings here, we use:
provider: releasesto ensure our output becomes a GitHub release;api_key: $RELEASE_TOKENto authorise the process to issue a release;skip_cleanup: trueto ensure our files aren’t deleted between phases;draft: trueto make the GitHub release a draft, only visible to users with write access to the repository; andon: tags: trueto ensure we only create a new release when we use Git Tags.
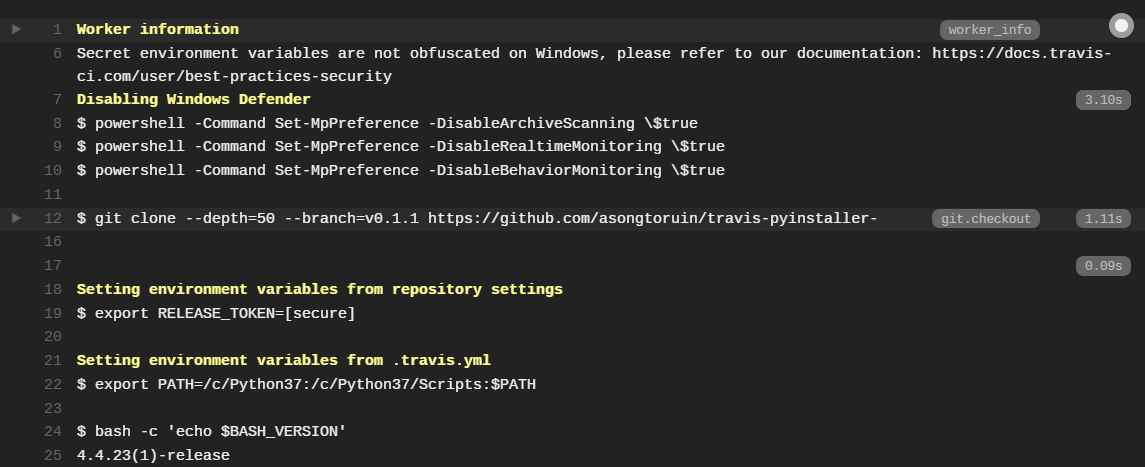
The last of these is particularly important. This ensures we aren’t issuing a release with every commit, which would probably be overkill. When we push a commit without a tag, our tests will still run but our build step is skipped:

The first draft
So, when we push our first commit with a tag, we actually see two builds start on Travis, one for the commit and one for the tag:

I’m not entirely sure why this happens - ideally we’d just have the one build, seeing as the two represent the same commit. Any suggestions here are welcomed. When the tagged build finishes it creates a new release on GitHub with our executable added, like so:
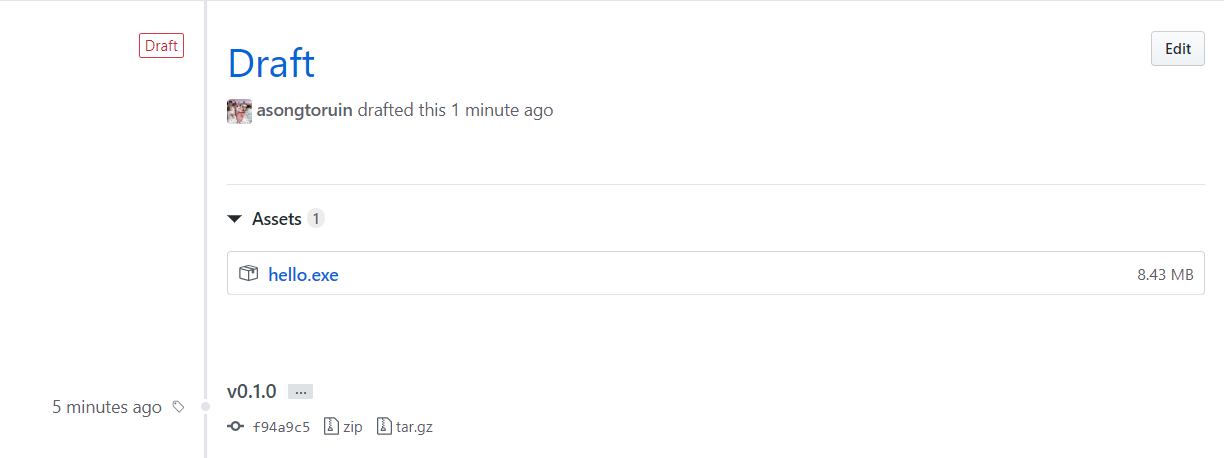
So the set-up works. However, the name just being “DRAFT” is less than ideal.
Improving release naming
As it turns out, one of Travis'
default environment variables
is TRAVIS_TAG, which contains the Git Tag of a build if connected to one. This
is perfect in our case, as we can add an extra line to our .travis.yml file:
# ...
deploy:
  provider: releases
  api_key: $RELEASE_TOKEN
  file_glob: true
  file: dist/*.exe
  skip_cleanup: true
  draft: true
  on:
    tags: true
  name: $TRAVIS_TAG (DRAFT)
With this, our draft Release will contain the name of the Git Tag used to create it, like so:
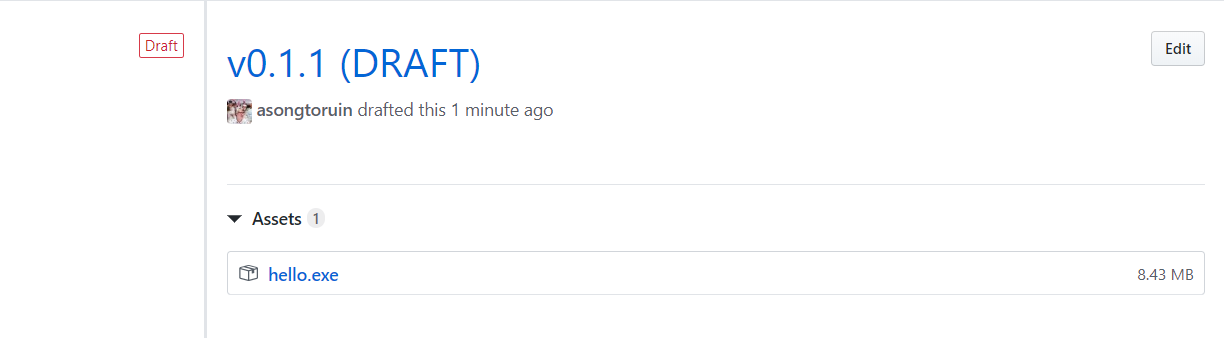
Which is pretty much exactly as we want it!